Creativity & Design Blog Post #32/17/2018 This week, I decided to go with my native realm of creativity: illustration. I took a few original characters of mine, Jack, Lane, and Amber, and drew them into a scene. Problem Type This creative problem is definitely familiar to me. But also, somewhat unfamiliar. I am an illustrator by trade, but I haven't worked in comics that much. Web comics, though, is something I want to get into in 2018, so I want to practice it as much as I can. Creativity Strategies This week, I went through my usual processes when I draw. I looked up references for things that I was unsure about such as posing and background elements. Not a ton of brainstorming was involved, since I was sure about the format and script before I started drawing. My Creative Process This little comic started with the basis of my characters: Jack and Lane are dating and Amber is their friend. Jack is easily embarrassed by any kind of affection, so just a simple tiny Valentine's card is enough to disable him. 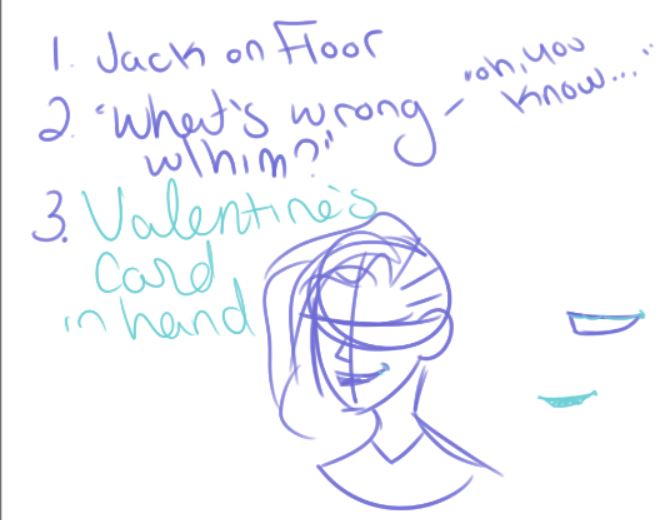 Firstly, I wrote out my script so I had it in front of me. I also doodled Lane and possible ways his mouth could look in the second panel. 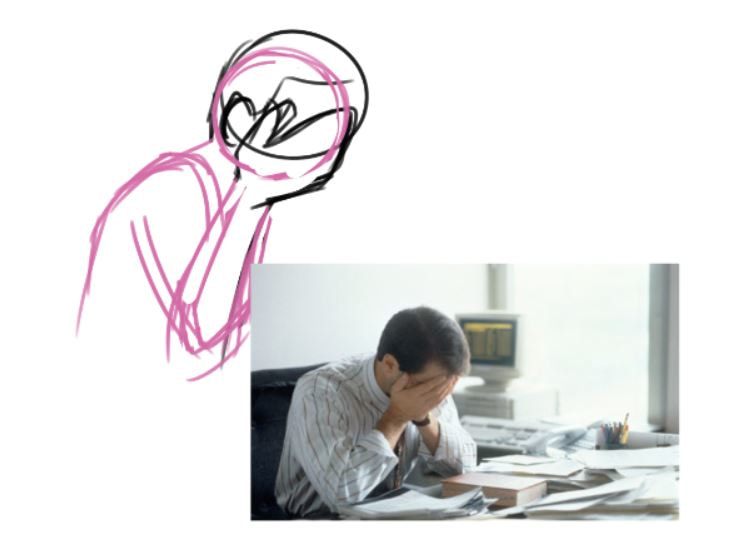 Second, I began sketching my hardest pose, Jack with his face buried in his hands. It took me a few tries for this one and I had to search for multiple references until I found the one that fit the most. 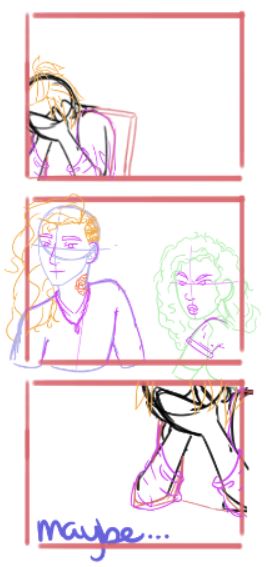 Once I had sketched out the basics of each panel, I moved on to lining. When I line, I usually use 2-3 layers with various colors to make it easier to draw fluid lines without worrying about making it perfectly line up. Some of this happened through trial and error, such as the Valentine's Day card. I didn't know what to write on it, so I had to look up some examples and write out a few before it looked right. Here's a sped-up video of the process: And here's the final product. I didn't want to worry myself over colors, so I kept it black and white. 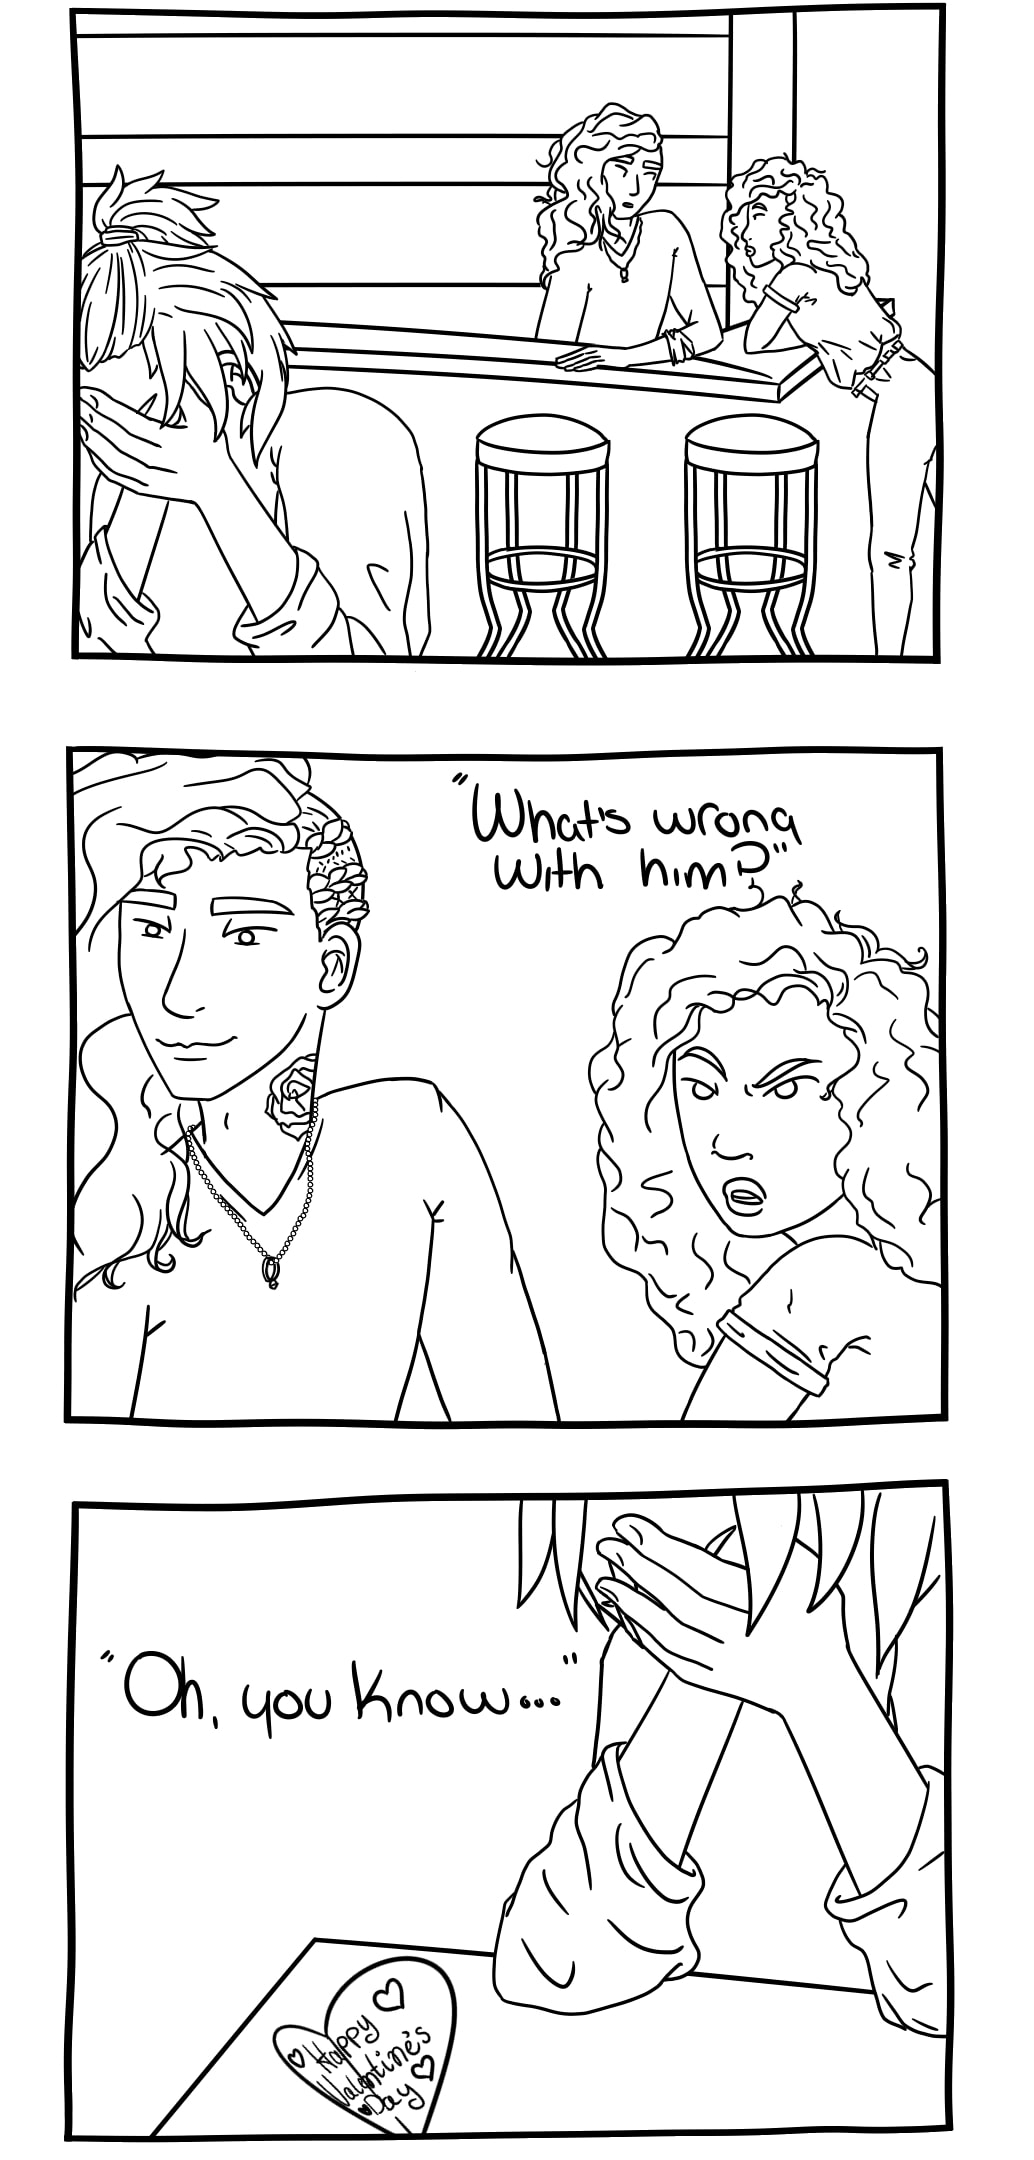 Reflection
Upon finishing everything, I realize that I forgot to line Jack's chair in the first panel. It's really not that big of a deal, as I can fix it easily. While it's not perfect, I'm proud that I did it. And I will always have the opportunity to clean up all the tiny mistakes and add color into it later. Ultimately, this project was entirely in my realm of practice. I love creating little stories, especially small domestic scenes that don't need a ton of action or drama to be entertaining. For sure in the next few projects, I want to branch out into unfamiliar territory with my weekly creative blogs.
0 Comments
Creativity & Design Blog Post #22/10/2018 This week's creative endeavor was putting together monthly tracker spreads in my bullet journal. I only recently started a bullet journal, so this is my first go at it. Until recently, I never attempted keeping a bullet journal because I thought it was only about keeping daily to do lists. I already do this on an app called Evernote, so it would be redundant and disorganized to have the same list as more than one medium. Also, a digital daily list is better for me because I add, remove, and rearrange the items on my list constantly, which isn't something you can do on paper. I recently discovered the many types of spreads that a bullet journal can have. I'm still in the process of building my spreads, but this week I just focused on the monthly ones. Problem Type Keeping a bullet journal falls under Unfamiliar and Risky. It's unfamiliar because I have never kept a bullet journal before. Not only that, but I haven't consistently tracked components of my life before. This kind of organization is unfamiliar to me. It's risky because spreads require accuracy in the measurement and placement of everything on the page. The journal I'm using has a grid on it, so I had to make sure that everything I made was the same size and placed in the right spot to work with everything on the page. This is risky for me because I'm naturally terrible at mathematic accuracy. I can't explain how or why, but being accurate with measurements is one of my weaknesses. Creativity Strategies The main strategy I used was brainstorming. I made a number of lists before starting my journal to figure out what exactly I was going to use this for. As you'll see in the pictures on my progress, I also wrote things down in order to keep it straight in my head and to allow myself to be creative without feeling trapped within the limitations of my journal. I concluded that I would use the journal to track my mood day to day, how long I sleep, if I eat my target calories, exercise, water intake, when I take my dog on walks, and when I water my succulents, among others. Depiction of my Creative Process 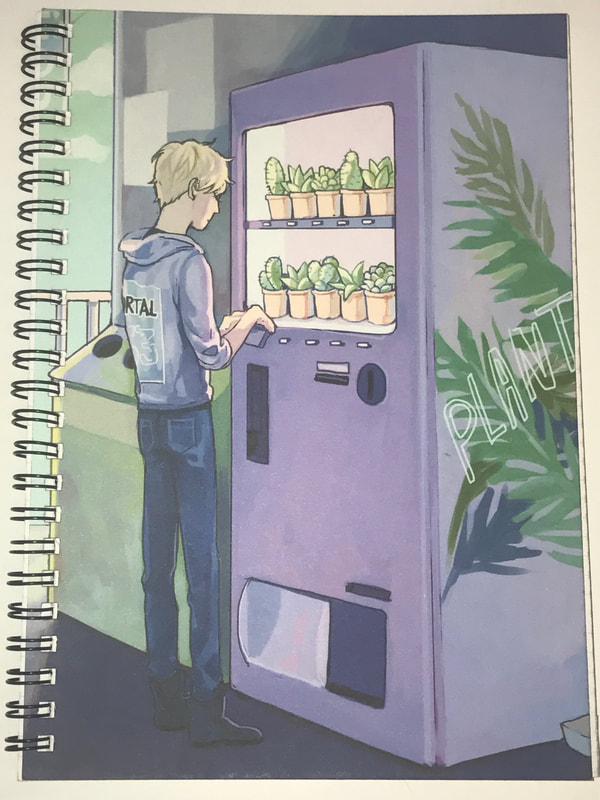 Here is the notebook I'm using for my bullet journal. I bought it off RedBubble from the artist Kel. It has a grids on the pages instead of lines. 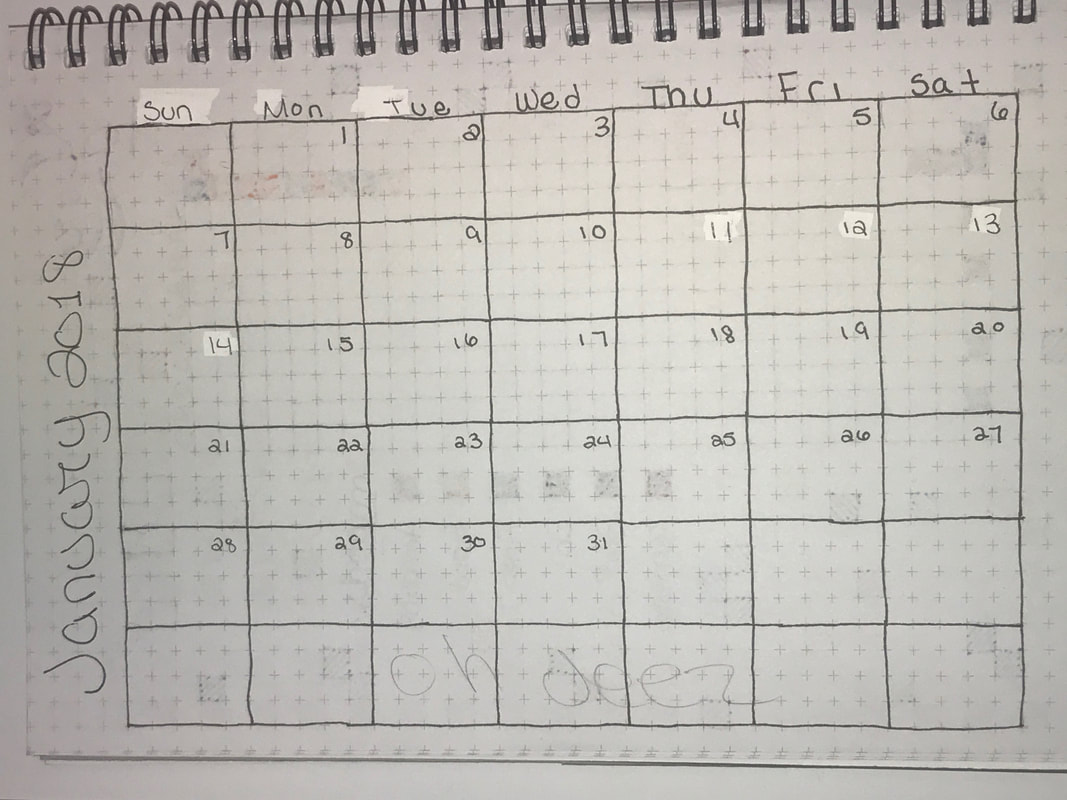 Above was my first attempt at a calendar. I practiced using January before I made one to use for February and the rest of the year. I made a few mistakes. For one, I put too many rows and so there's an extra at the bottom. Next, I messed up the day names, starting the week with Monday instead of Sunday. Then, I skipped 11 when writing the numbers of the days. In all, not a bad start. 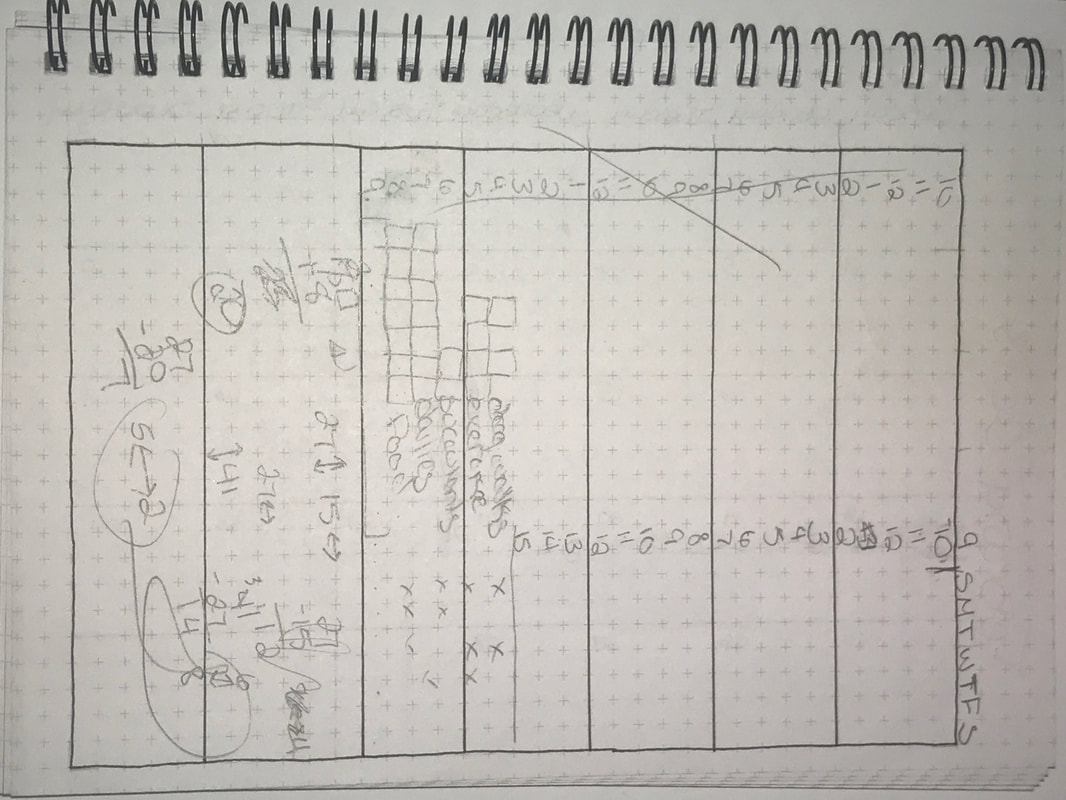 Here, I tried making the January calendar again, this time with less rows, but I goofed when drawing the lines, so some rows are bigger than others. I gave up on this page and instead used it as scratch paper to figure out the tracking spreads. 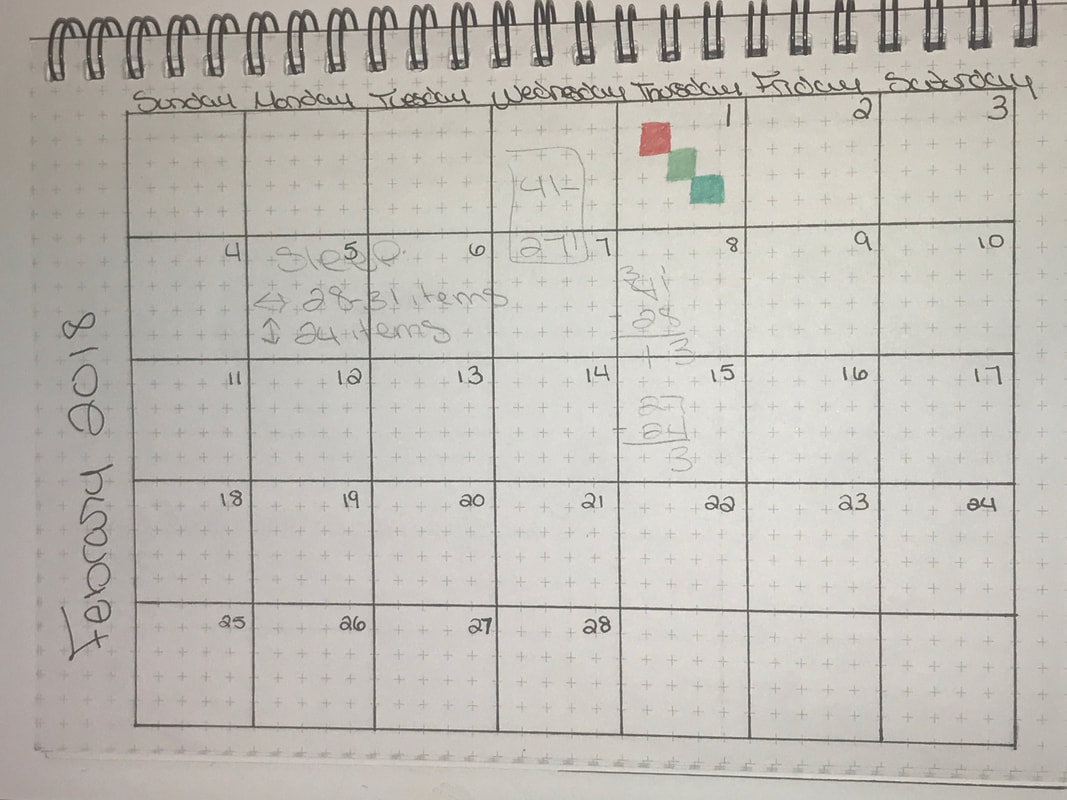 Here, I made the calendar for February. It isn't flawed, but I realized I don't actually need this kind of calendar for my tracking, so in the end I didn't use this page for its intended purpose. I planned out the next iteration instead. 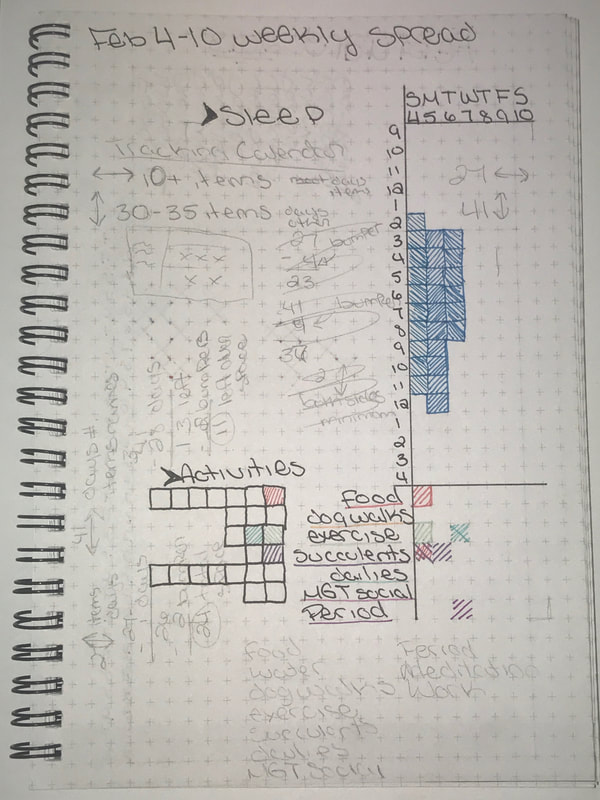 Here is the first iteration of my tracking spreads. At first, I tried putting both the sleep tracker and the other trackers on the same page. As you can see, I used it for a few days, then decided it didn't work as I had planned. I wrote in pencil the plans for the new spreads. 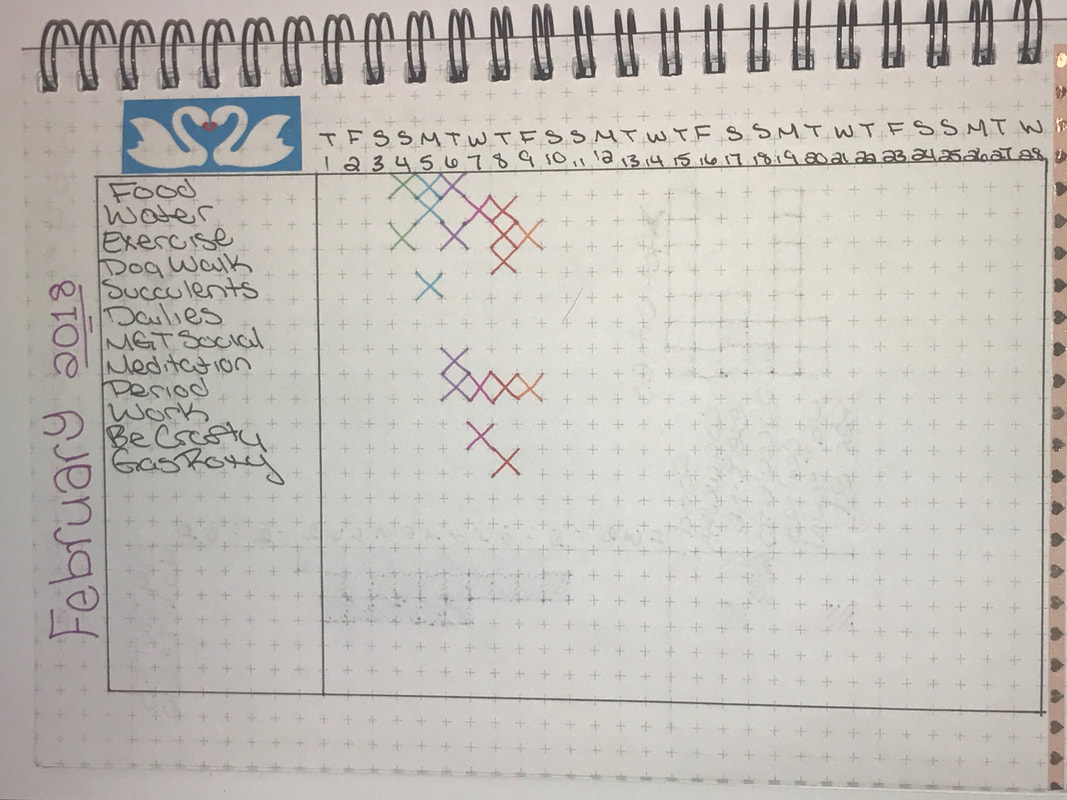 Here's the final format that I settled on. I decided to use two pages per month for spreads, plus two pages for doodles and collages (which I haven't filled yet). Some of the things I'm tracking are meant to be checked off everyday while others, like watering my plants or putting gas in my car, are things I need to do only a few times a month. I decorated the edge with washi tape. 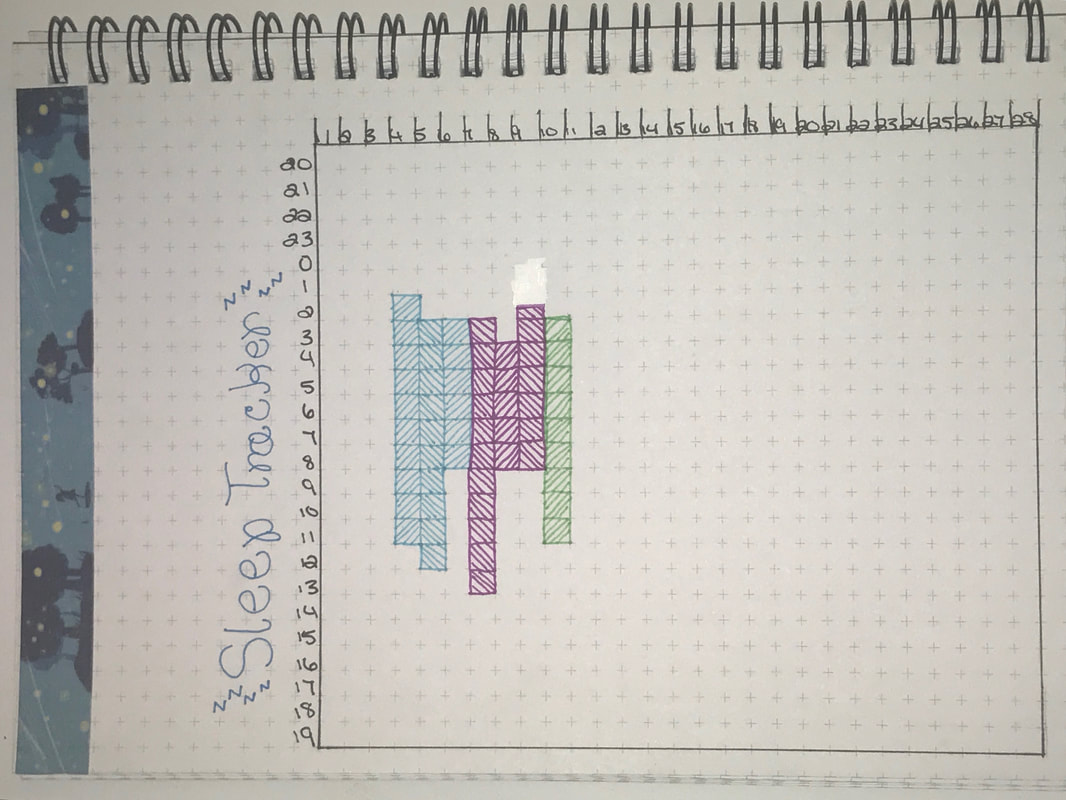 And here is my final sleep tracker. I wanted to include all 24 hours of the day because I also figured that I could track any naps I take as well. Here's a video tour of the first 10 or so pages of my bullet journal: Reflection
I believe this creative project has been a success so far. I was apprehensive about making it perfect, so I gave myself room to make mistakes. Ultimately, I think this will work out in the long run. It gives me the opportunity to track daily habits and health items while also allowing me to decorate the pages and be creative in that aspect. I haven't decorated the pages too much yet, only using some washi tape and colored pens. I plan on spending time each month doodling and drawing little icons all over my bullet journal in order to further its creative value and give it some pizazz. Even though I spent a few pages messing up and being messy, I decided that I'm going to cover them with collages and washi tape so that they still look nice and I don't have to tear them out of the notebook. Creativity & Design Blog Post #12/3/2018 The process I've chosen to document is creating a logo for myself. In my business class, we've been working on identifying and strengthening out personal brand. Part of this involves creating a logo for ourselves or a business we want to make in the future. I'm not interested in making a business at the moment, I'm work in the realm of freelancing and see myself being here for a few years. In this case, it could be said that freelancing is my business. Problem Type This project falls under Too Many Degrees of Freedom and somewhere between Unfamiliar and Familiar. In terms of familiarity, I've made logos before and I have experience with graphic design, but it's not my forte. I don't focus on graphic design, so that's where the unfamiliarity comes into play, though I believe my artistic skill gives me some level of familiarity with logo creation. One of the problems I had with this creative venture was I could literally make anything. I was frozen by the possibilities. In fact, I believe there to be so many possibilities that I had trouble thinking of a single idea. Creativity Strategies So unfortunately, I worked on my logo before reading this assignment. I wasn't able to look up creativity strategies before I dove into this. On the bright side, my logo is a work in progress and what I turned in will be altered. I will make sure to research strategies for future blog posts. That being said, I have my own process that I go through when drawing something. I did scroll through some pages of Zig Zag. On page 97, it suggests keeping an Idea Log. I do something similar in which I have an app on my phone called Evernote where I keep ideas for stories and art pieces. Similarly, I write down ideas in my sketchbook throughout the doodles on the pages. Depiction of My Creative Process 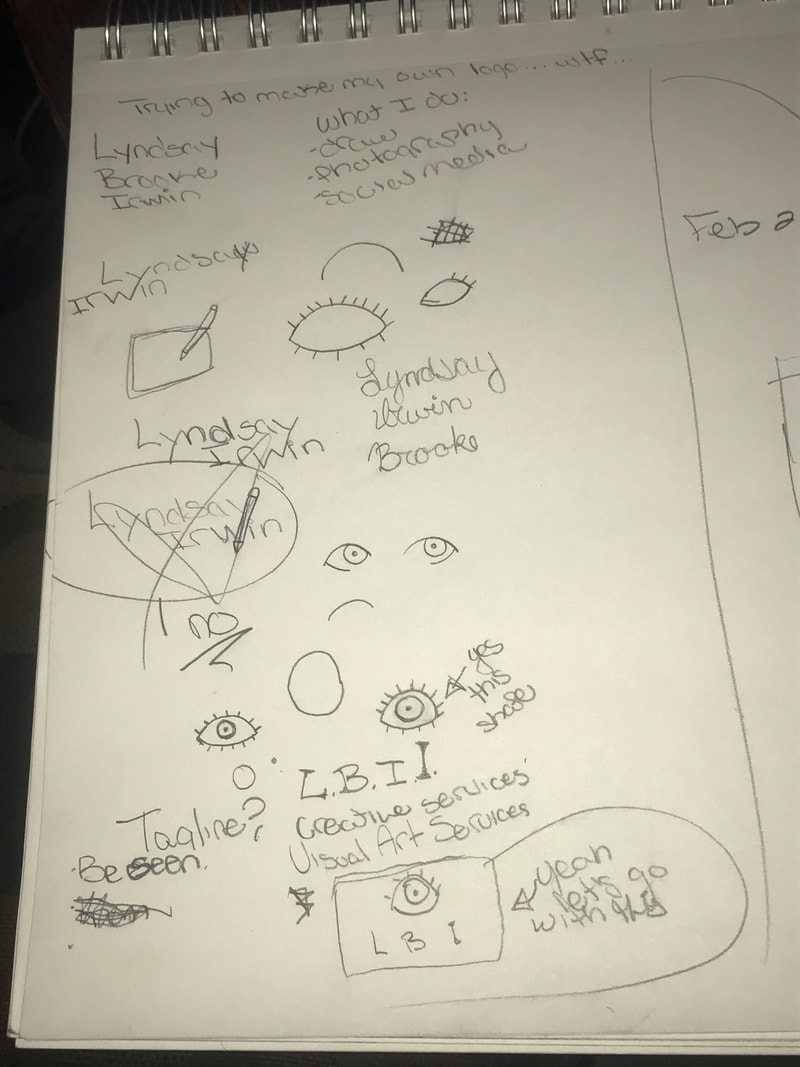 This image outlines the process I went through in the initial stage. At first, I started with ways I could take my name and make it graphic. In my head, I imagined the "y" at the end of my first name extending to the "w" of my last name. I didn't like this. To help me figure out what my brand is, I listed the services I practice and offer to clients. This includes illustration, photography, and social media marketing. I concluded that since these all rely on being visual media. My next idea was an eye. I drew a few quick iterations of what this could possibly look like before I went to a digital setting. I also considered putting a tagline on my logo, but I opted for a minimalist look with just my initials. The bottom of the image shows my final sketch before going to my computer.
These two images show me messing with brushes. It turns out I didn't like a brush and wanted to make my logo crisp. I used my Wacom Intuos 5 tablet on my HP laptop in the free drawing program FireAlpaca.  Here, I thought I was finished. I had perfected the line thickness of the eye and went through dozens of fonts before choosing Bell MT. I knew I wanted a serif font because of the clarity it would give the capital "I" instead of it looking like a lowercase "l". After I exported the file into a jpeg, I decided to try adding eyelashes. I really like the depth that came with the eyelashes. I decided to use this as my final logo. To me, it's striking and I pulled off the minimalist look. Unfortunately, I'm not in love with it, so I hope to improve this design or design something new that I can appreciate and use in my professional life. Here is a video that shows each transformation in sequence: Reflection
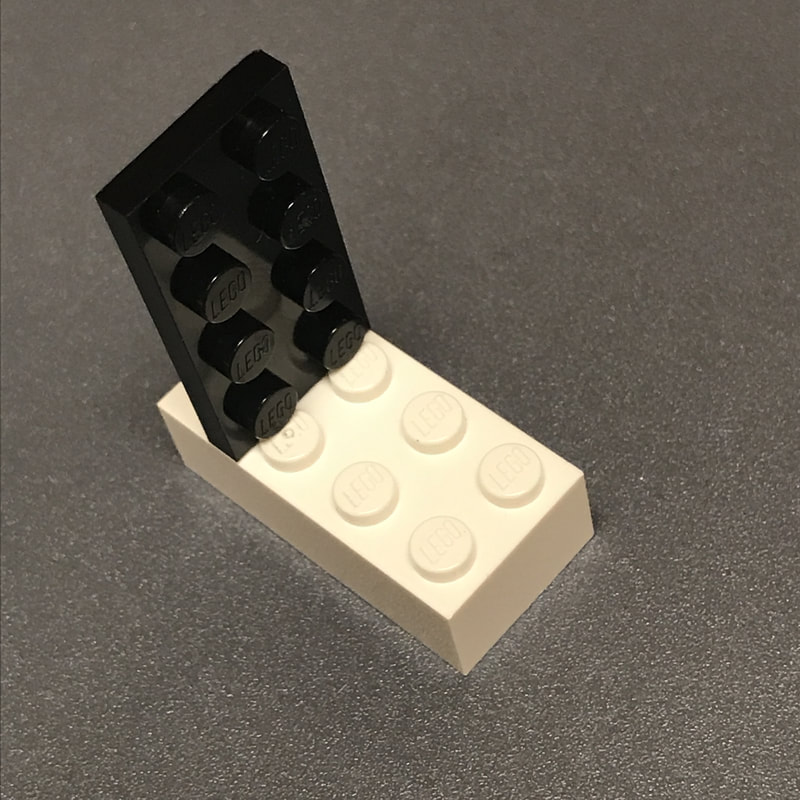
Ultimately, while I don't hate my logo, I know I want to make something different. It was super hard making this out of the infinite variations that were possible. That's how art always is, making something out of nothing. I was about to say that with my illustrations, I have a story or character to draw and that's why I had troubles with this logo assignment. The truth is, though, I am a character in the story of my life. That was one of the lessons we learned in my business class this week. An element that helps us build our personal brand is telling a story with our life. I really hope that I can analyze my life and my brand to come up with an improved logo for myself. I also look forward to learning about creative techniques so I can apply them to this logo and the other creative projects in my classes and life. Module 2 Pre-Lab: LEGO Instructions1/30/2018 Techniques I'll start off with the most interesting SNOT technique I found on Swooshible: The Pony/Reverse Pony I've honestly never considered putting a flat piece sideways on top of or underneath another. Pretty fascinating.
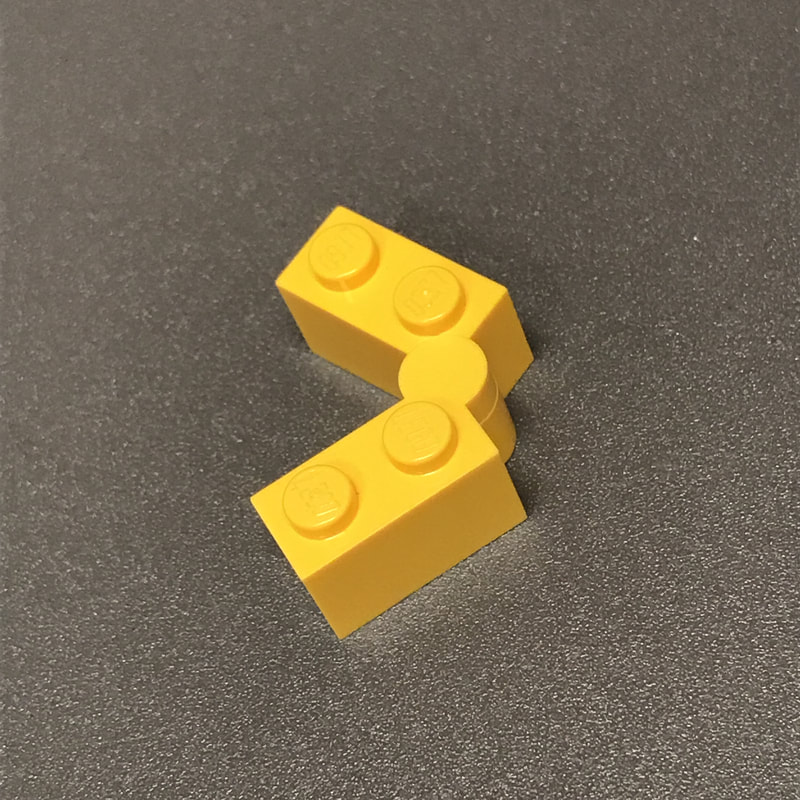
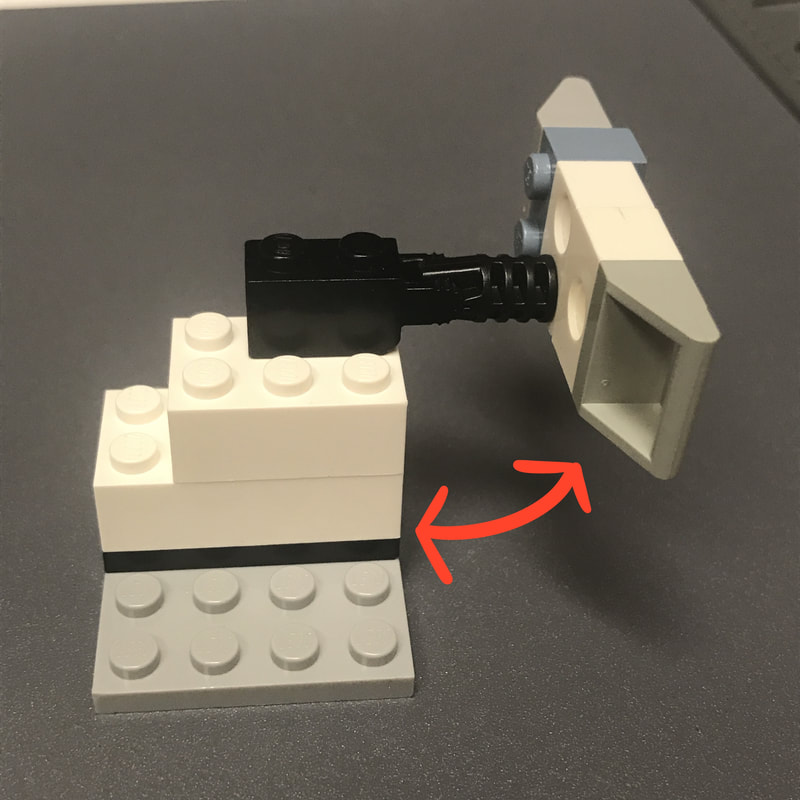
Hinge Bricks This one is straightforward. There are two 1x2 blocks connected by a hinge. This allows you to move the blocks together and away freely.
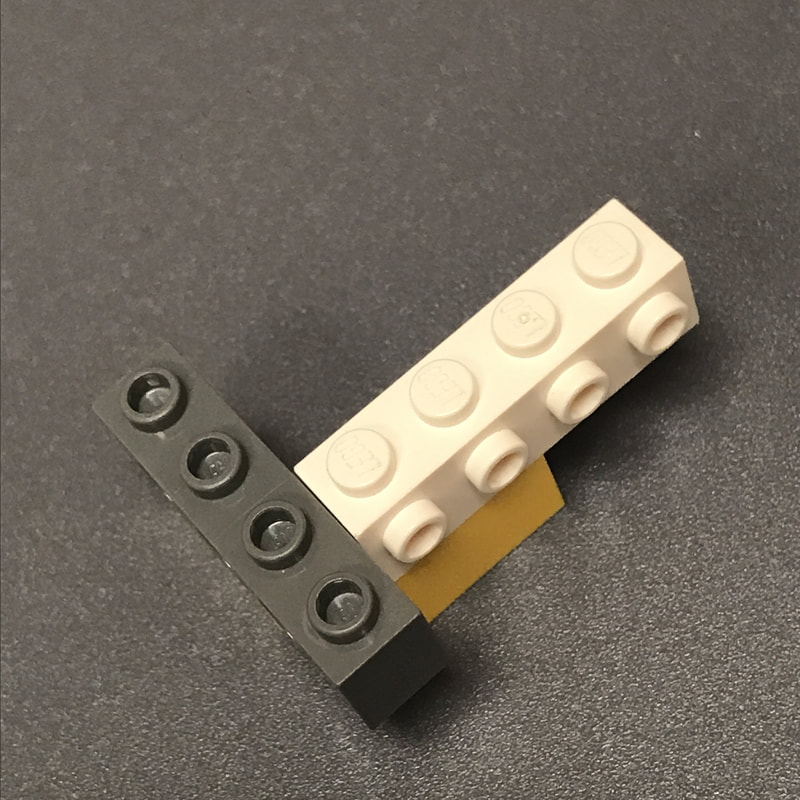
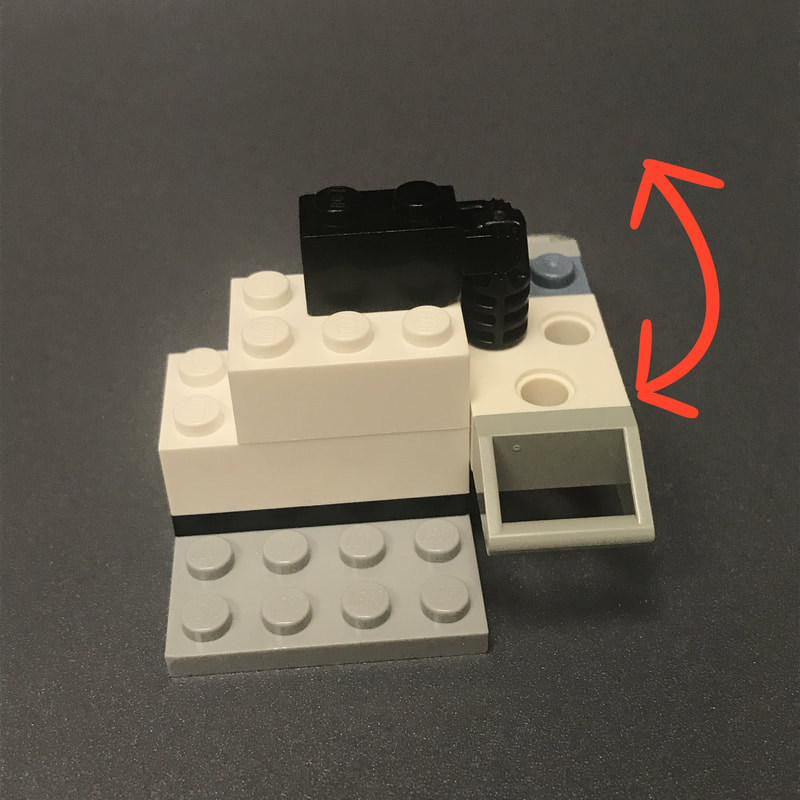
1x2-2x2 Bracket This piece is stationary, but provides a 90-degree change in direction.
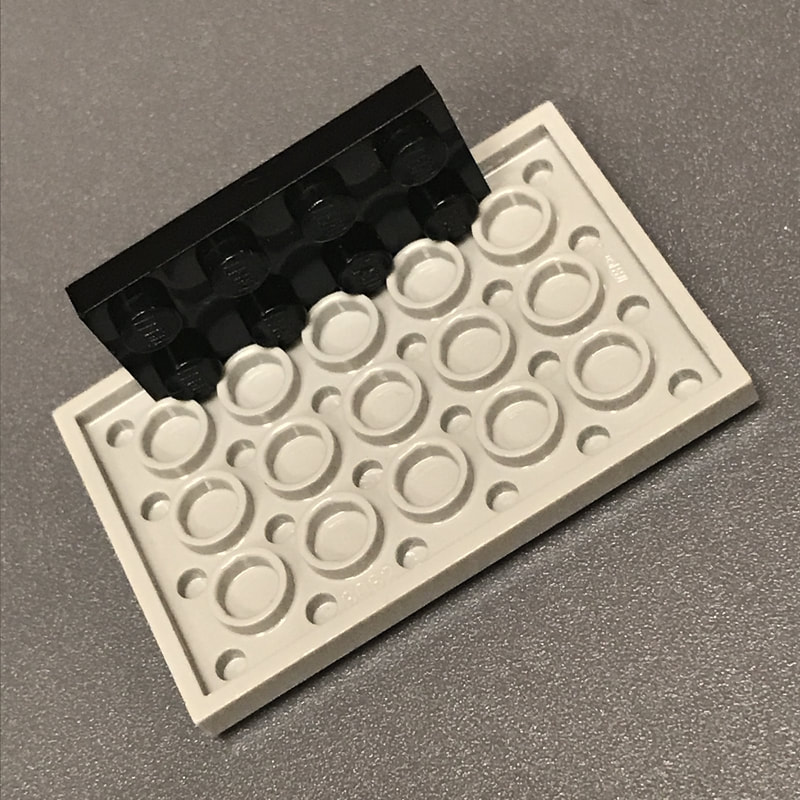
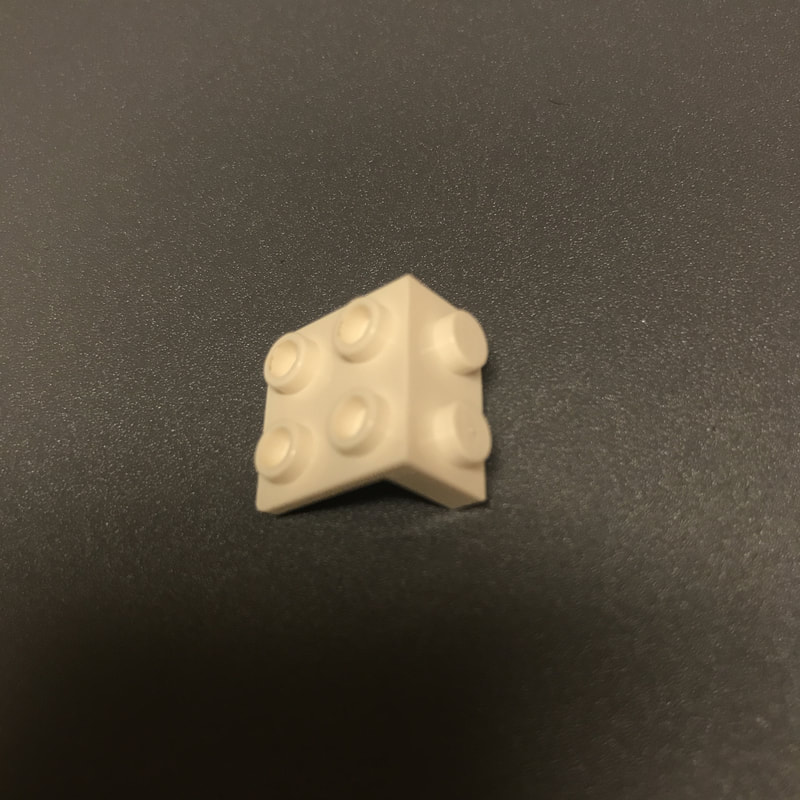
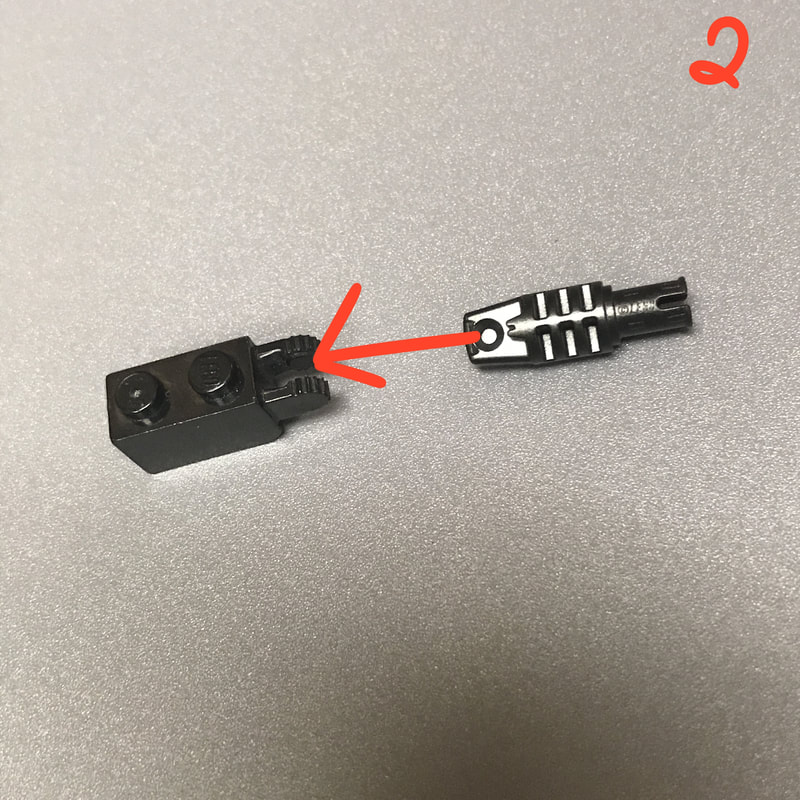
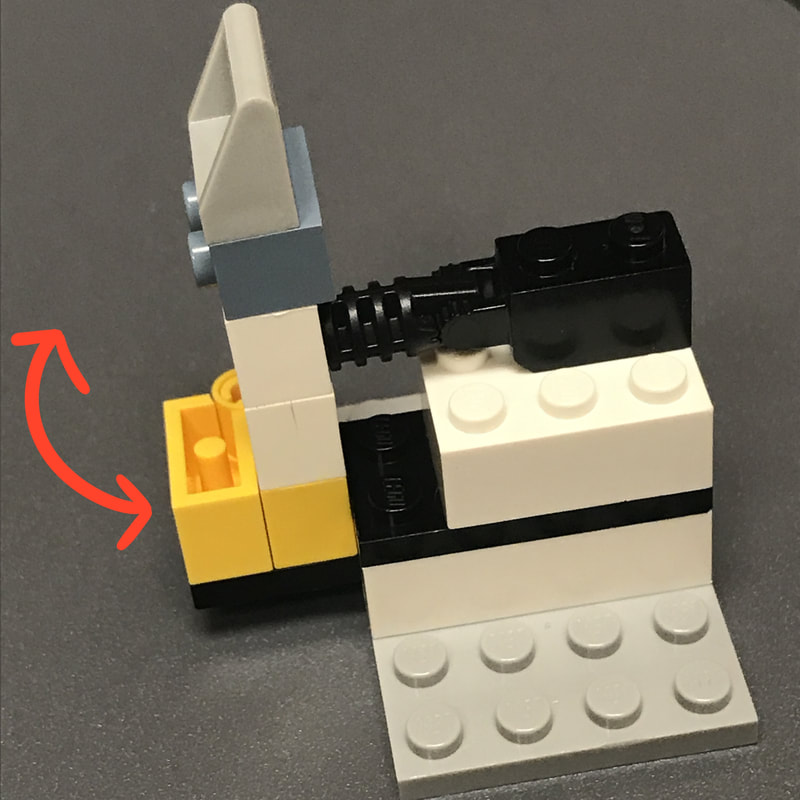
The Switch 
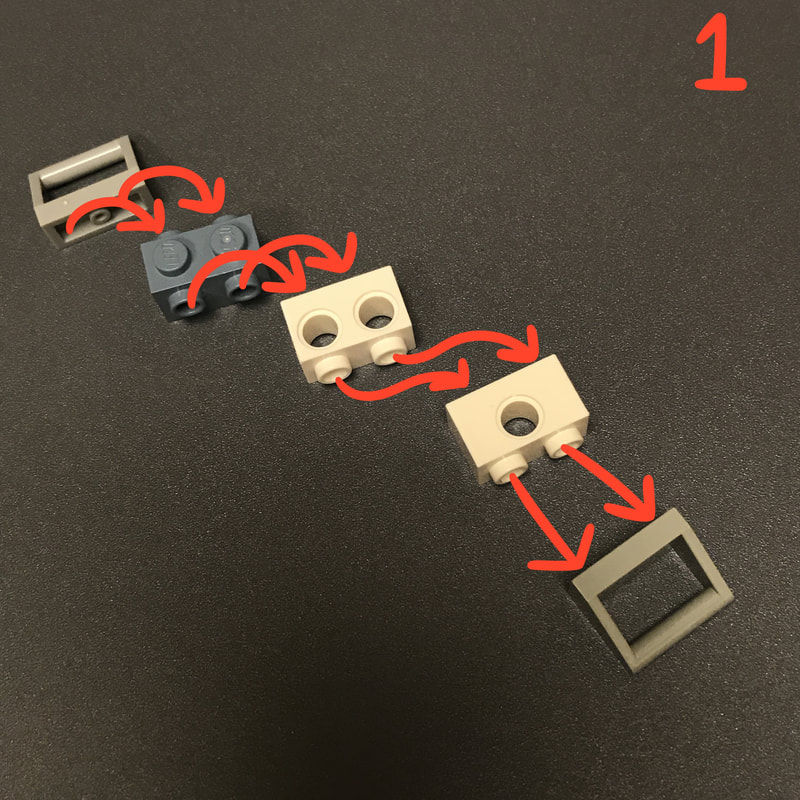
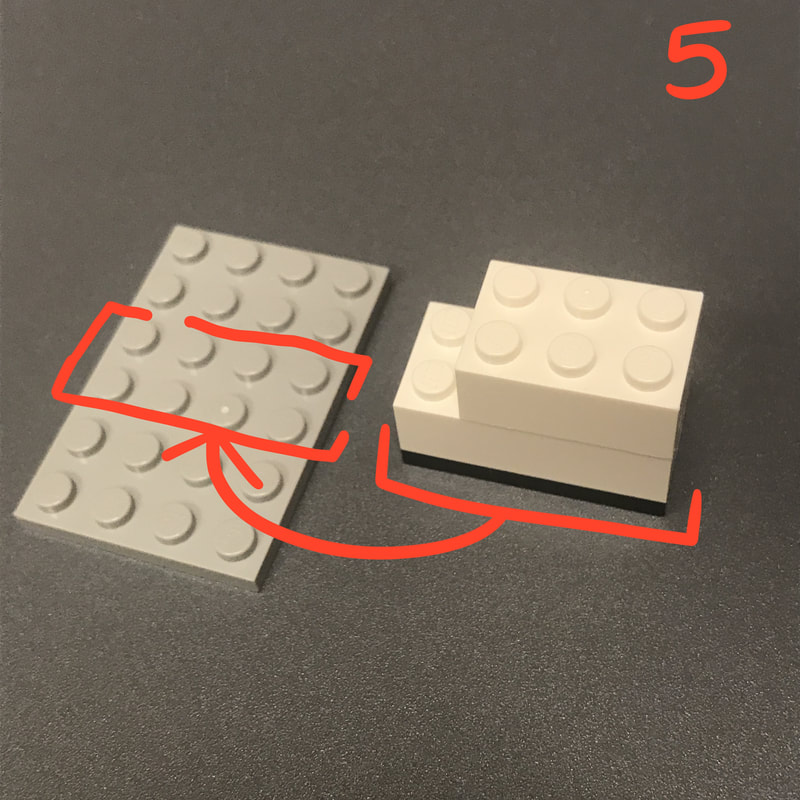
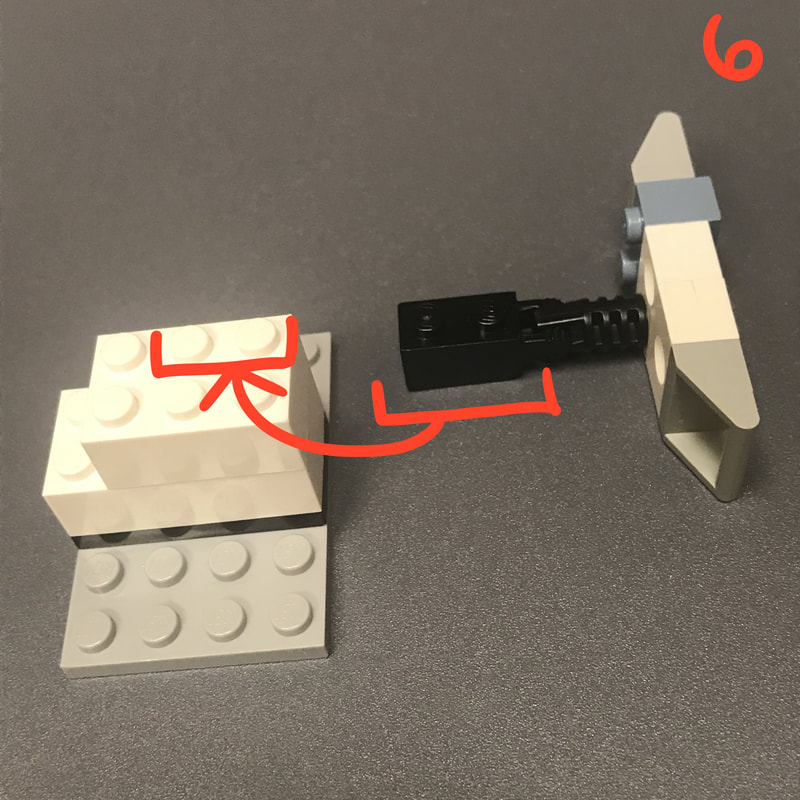
Steps 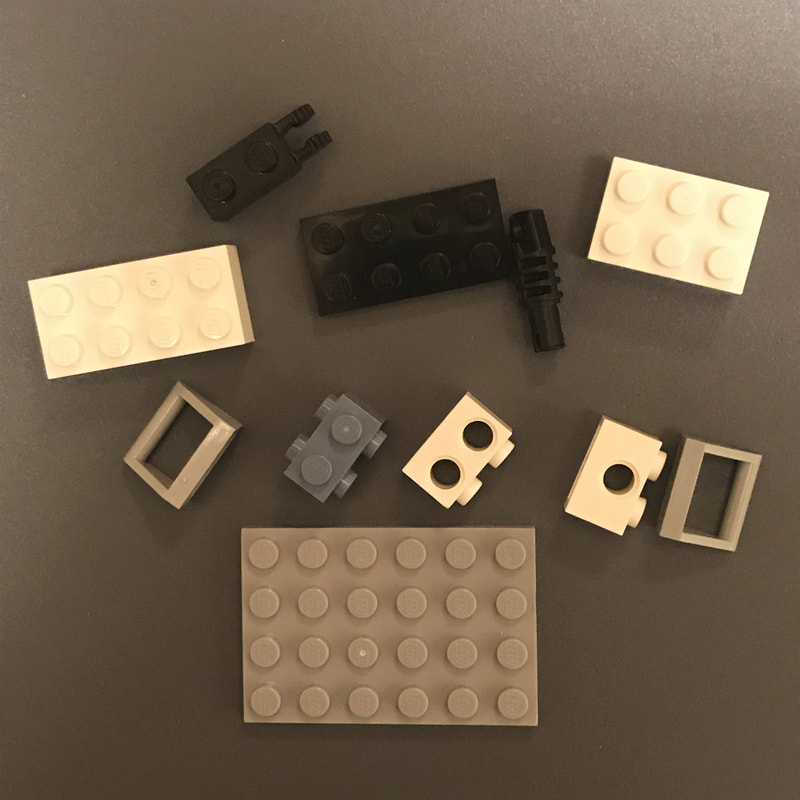
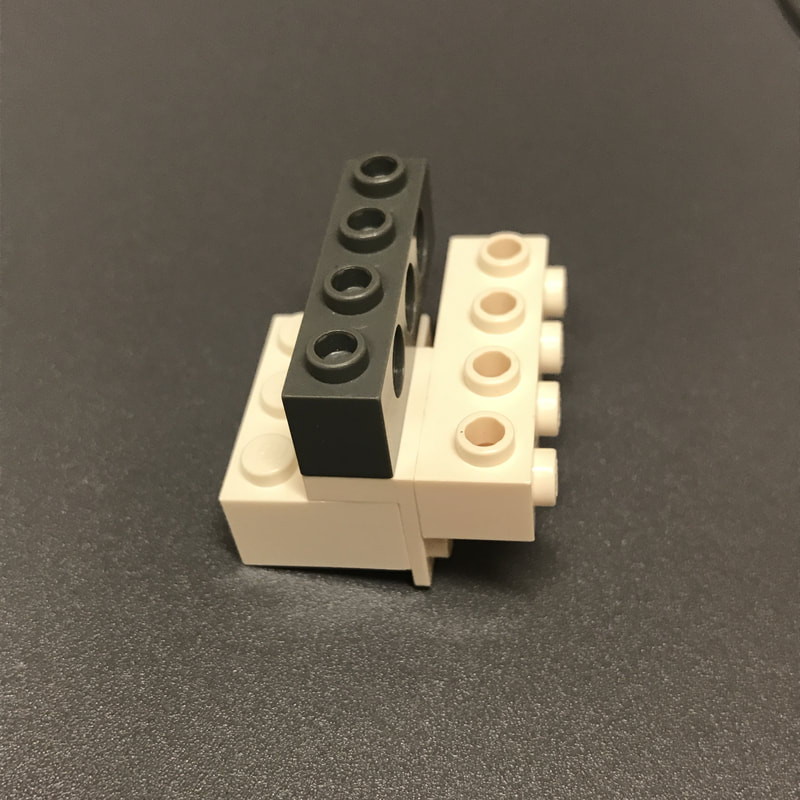
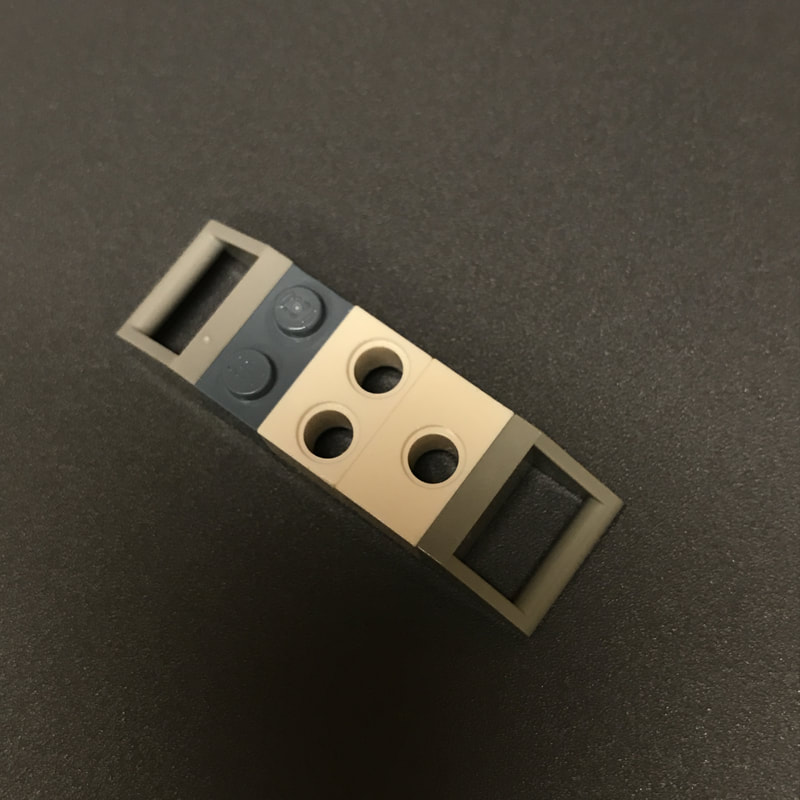
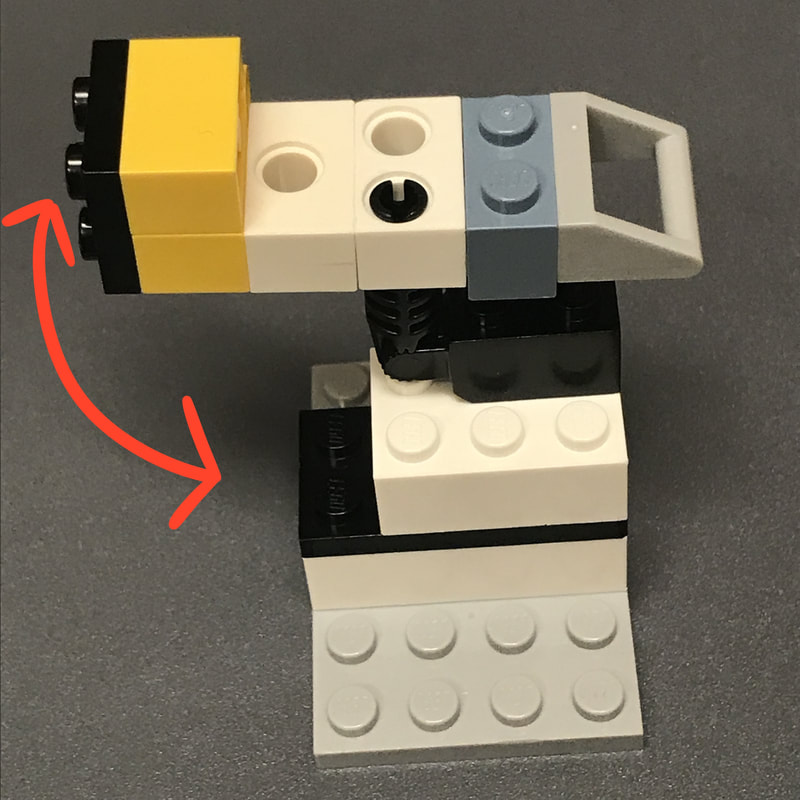
Bonus I also came up with a variant that features the same idea with a few different pieces and a 180-degree rotation:
AuthorA digital media student with a focus in visual development, illustration, and photgraphy. Archives
April 2018
Categories |


 RSS Feed
